In this walk-through we’ll build a dynamically generated form based on user usage of our form, the more fields the user will fill in our form the more input fields we will provide them to continue and use the form.
The example in the article is just an example using text input fields, you can achieve similar behavior with other form fields (e.g textarea, radio button, select, etc…). Like auto generated textarea or radio buttons or select dropdowns etc. You’ll just need to adjust the UI and some of the logic behind this code samples.
<pre class="wp-block-syntaxhighlighter-code"> import React from 'react';
import { FontAwesomeIcon } from '@fortawesome/react-fontawesome'
import { faMinusCircle } from '@fortawesome/free-solid-svg-icons'
import './cat-list.css';
class CatList extends React.Component {
renderList() {
return null
}
render() {
return (
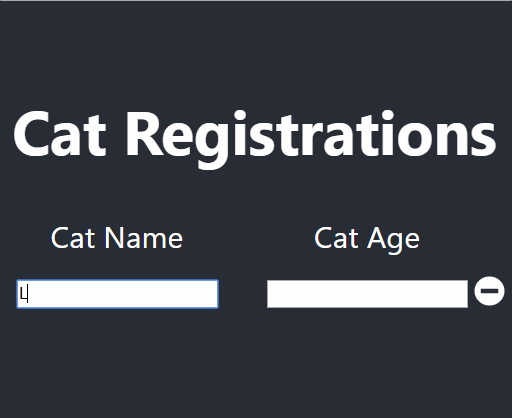
<div className="row custom-headers Rtable Rtable--2cols">
<div className="Rtable-cell">Cat Name</div>
<div className="Rtable-cell">Cat Age</div>
{this.renderList()}
</div>
);
}
}
export default CatList;
</pre>
After we create the HTML markup, we’ll attach an event onChange with the next function called “handleChangeOfCatDataFactory”. The function name provides us with all of the function tasks:
– handle: means we write code to perform an action following user interaction. In this case the “onChange” event.
– ChangeOfCatData: implies we are about to modify the piece of data called “CatData”.
– Factory: implies that the data we are about to change is depends on a dynamically injected key (in our case, the function accepts “type” argument which can be one of two options: “catName” or “catAge”).
Note that we use arrow functions for binding “this” (instead of binding in the constructor), We create a new array for immutability and we use “type” and “itemIndex” to apply changes at the correct location.
 handleChangeOfCatDataFactory = (type, itemIndex, generateKey) => (event) => {
    const catData = event.target.value;

    this.setState((prevState) => {
      const newCatList = [...prevState.catList];

      newCatList[itemIndex] = {
        ...prevState.catList[itemIndex],
        generateKey: generateKey,
        [type]: catData,
      };

      const showNewField = this.shouldCreateAdditionalFields(newCatList);

      return {
        ...prevState,
        catList: newCatList,
        showNewField,
      };
    });
  }
Our core rendering function will contain two places in code, where we render our inputs, The first one would be for pre-populated inputs, those already have a content and the second one would be the inputs that are empty and ready to receive user content.
In the code sample below, we query the internal state for existing data(in that case “catList”). We use “map” to transform the data to UI components, We then decide with the help of according to the value of “showNewField” flag if we should display empty fields for the user to add more content.
Note that we use “onChange” to maintain those inputs “controlled” by React with the function “handleChangeOfCatDataFactory” and we use “getCatDataSafely” to pull data into the input because the data structure(array of objects) is dynamically generated and sometime will be half empty and will break unless we try to get the data in a “safe” manner. We use “generateKey” to create a key which helps React manage rendering the list properly
<pre class="wp-block-syntaxhighlighter-code">
  renderList() {
    const {
      catList,
      showNewField,
    } = this.state;
    const nextIndex = catList.length;
    const listOfCustomHeaderField = catList.map((cat, index) => [
      <React.Fragment key={cat.generateKey}>
        <div className="Rtable-cell">
          <input
            type="text"
            value={this.getCatDataSafely(index, 'catName')}
            onChange={this.handleChangeOfCatDataFactory('catName', index, cat.generateKey)}
          />
        </div>
        <div className="Rtable-cell">
          <input
            type="text"
            value={this.getCatDataSafely(index, 'catAge')}
            onChange={this.handleChangeOfCatDataFactory('catAge', index, cat.generateKey)}
          />
            <FontAwesomeIcon icon={faMinusCircle} className="icon-delete-wrapper" onClick={() => this.deleteCustomHeader(index)} />
        </div>
      </React.Fragment>
    ]);
    // do we need to add additional new empty row?
    if (showNewField) {
      const generateKey = this.generateKey(1, 100000);
      listOfCustomHeaderField.push([
        <React.Fragment key={generateKey}>
          <div className="Rtable-cell">
            <input
              type="text"
              value={this.getCatDataSafely(nextIndex, 'catName')}
              onChange={this.handleChangeOfCatDataFactory('catName', nextIndex, generateKey)}
              placeholder="Enter a cat name"
            />
          </div>
          <div className="Rtable-cell">
            <input
              type="text"
              value={this.getCatDataSafely(nextIndex, 'catAge')}
              onChange={this.handleChangeOfCatDataFactory('catAge', nextIndex, generateKey)}
              placeholder="Enter a cat age"
            />
          </div>
        </React.Fragment>
      ]);
    }
    return listOfCustomHeaderField;
  }
</pre>
Part of the UX behavior we need to have logic whether if the user needs additional fields at that moment or not base on the user filling the data in our data/state object of “catList”. This function can be tested since it’s logic is isolated and in addition we can make this function smarter and improve it’s UX since our current logic is simple and straightforward. We want to make sure that for all inputs both fields are filled, before displaying new inputs.
shouldCreateAdditionalFields(catList) {
return !catList.find((catData) => (
  !catData.catAge || !catData.catName)
);
}
Due to the dynamic nature of the data in the component state, we try to access data with index that might not exist at that moment. For example, user add data for “catName” but haven’t added data for “catAge” for cat with index number 2. In order for our application to avoid crushing when data is incomplete we try to access that data with helper “get” method that try to pull data from our dynamic data structure safely.
getCatDataSafely(index, keyToCheck) {
const {
  catList,
} = this.state;
return (catList[index]) ? catList[index][keyToCheck] : '';
}
As part of the user experience the user can delete input fields by pressing the “X” button. We’ll destruct our array to safely and maintain immutability of our data and than use “Array.splice” to remove a cat from the list base on provided “index”.
deleteCustomHeader(byIndexId) {
const {
  catList,
} = this.state;
const newArray = [...catList];
newArray.splice(byIndexId, 1);
this.setState({
  catList: newArray,
});
}
The generateKey function creates a random key to allow React manage the list of items properly. Ideally this function should reside in a utility library and should not be a part of our UI component. Read more about keys in React here.
generateKey(maximum, minimum) {
  return Math.floor(Math.random() * (maximum - minimum + 1)) + minimum;
}
As a front End developer you have the opportunity to take a bigger part in the development of your product, working tightly with the designer and product manager can result with improved user experience for your clients and overall better products. Check out the github project written with the help of Create React App.

Lior Amsalem embarked on his software engineering journey in the early 2000s, Diving into Pascal with a keen interest in creating, developing, and working on new technologies. Transitioning from his early teenage years as a freelancer, Lior dedicated countless hours to expanding his knowledge within the software engineering domain. He immersed himself in learning new development languages and technologies such as JavaScript, React, backend, frontend, devops, nextjs, nodejs, mongodb, mysql and all together end to end development, while also gaining insights into business development and idea implementation.
Through his blog, Lior aims to share his interests and entrepreneurial journey, driven by a desire for independence and freedom from traditional 9-5 work constraints.
Leave a Reply